Stage plot & input list best practices: 11 tips
How to make a tech rider any sound engineer can read: stage plot, channel list and how to send it.
1. Clarity first: simple shapes, little color
A stage plot isn't a poster: it gets read in a hurry, sometimes in black and white and in low light. Use the simplest shapes you can and simple icons wherever possible. Add text boxes or short labels when they make things clearer. Use color sparingly when it helps people read the plot faster, but remember the rider also has to make sense when it's printed without color.
2. Numbered monitors
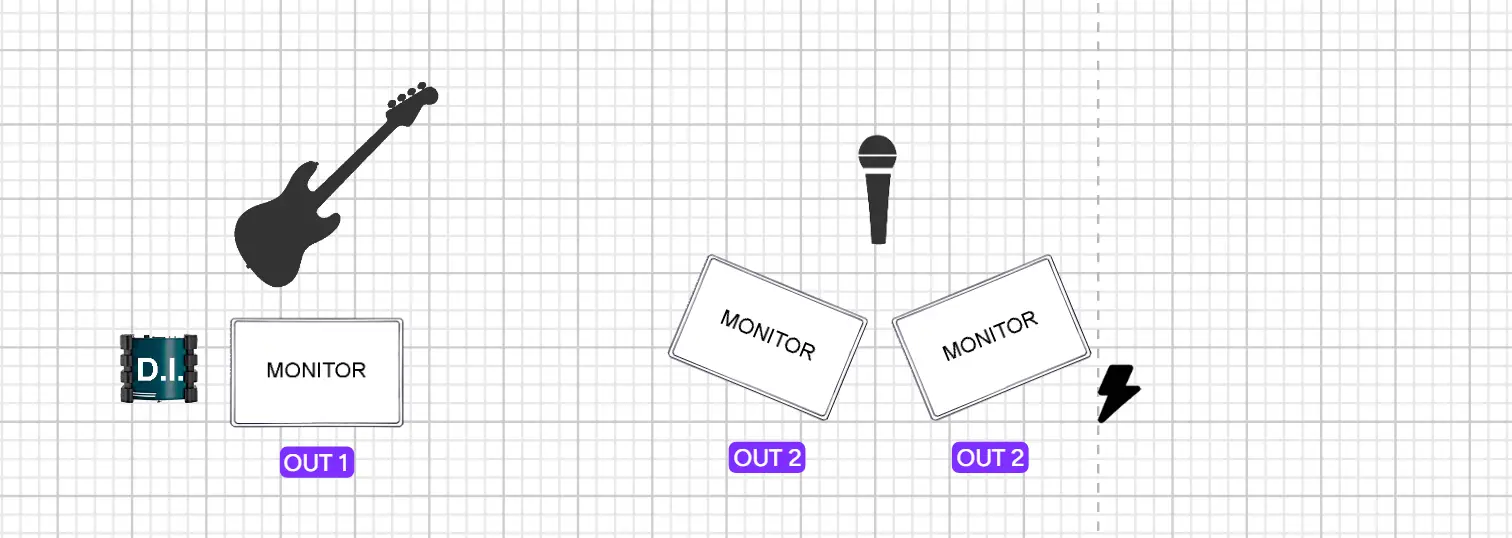
Number each monitor with its mix, left to right and front to back. If someone wants two wedges, draw both. That way the engineer knows how many wedges to put out, where and for whom, even when the band arrives with no time to spare.
3. Mark where you need power
Pedalboards, IEM beltpacks, keyboards, active DIs: mark every power drop on the plot. If the event is abroad, state the voltage and the plug type.
4. Always drawn from the audience's point of view
Draw the stage the way the engineer sees it from the mixing desk. It's the reference every engineer expects.
5. The stage plot and the channel list must match
If the plot shows three vocals, the channel list needs three vocals too. When they don't match, the engineer doesn't know which one to trust.
6. The standard channel order
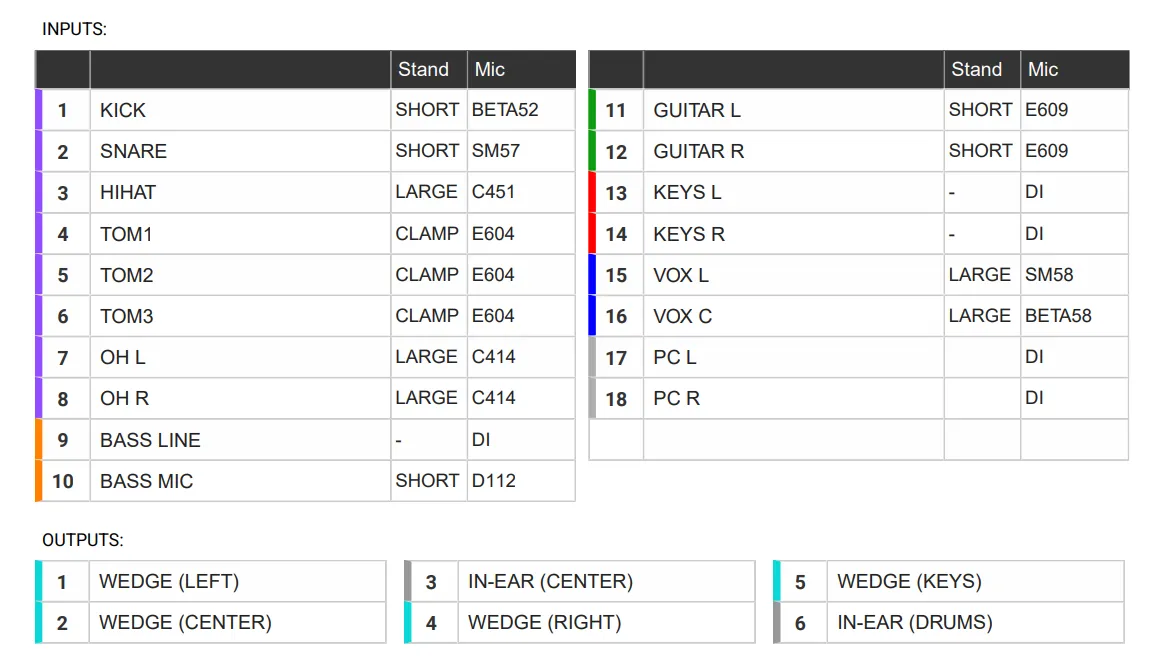
Drums first (kick, snare, hi-hat, toms from high to low, overheads), then bass, guitars, keys and vocals last, with no gaps. It's the order every engineer expects to find. If there are several vocals, number them left to right and front to back.
7. Each channel: a short name and its mic or DI
A short, clear label the engineer can recognize at a glance, and the mic or DI for that channel. "Keys x2" doesn't say whether it's two mono keyboards, one stereo keyboard or two stereo ones; in that case, the right way is to name them "Keys 1 L" and "Keys 1 R".
8. Stereo pairs start on an odd channel
Start every stereo pair on an odd channel (15/16, not 16/17): the two channels of a keyboard, the two channels of a laptop. Many consoles won't link two channels if the first one is even.
9. Include an output list
Number every monitor mix, stating whether each one goes to a wedge or to in-ears, and whether it's mono or stereo.
10. Use the details to say who brings what, and who to contact
In the rider's details text, include:
- your requirements;
- what the artist brings and what whoever sets up the show provides (the venue, the sound company, the theater…);
- anything non-standard, you bring yourself: if your violin has its own mic or you use your own in-ears, write it down and make sure they travel with you;
- a technical contact: name, phone and email of someone who can answer technical questions. If you publish your rider link, make sure that person agrees, and switch the details text to visible in the Details tab (in Ridermaker, the details text is hidden by default in the published link, so you can turn it on if you want).
11. Always send the latest version, and bring printed copies
Send it at least a week ahead, ideally as the rider link, so whoever receives it always sees the latest version and the date it was last updated. Bring the PDF printed to the show as well. If you want the date on the PDF, put it in the rider name (for example, "Band – Rider 2026-November").